Adding Captions to Panopto Videos
- Gerard Ross
Introduction
Note: Automatic captions have now been enabled. Panopto will generate and embed captions when an uploaded video has finished processing.
This page is intended to give guidance on adding captions to your Panopto Videos. In addition to making video content more accessible to viewers with impaired hearing, captioning can actually improve the effectiveness of video:
- Captions improve comprehension by native and foreign language speakers. A 2006 Ofcom study showed 80% of people who use video captions don’t even have a hearing disability.
- Captions can help compensate for poor audio quality or background noise within a video.
- Captions make video useful when a person is watching with the sound off or viewing in a noisy environment that obscures the sound.
- Panopto indexes video captions and includes them in search results.
Table of contents
Types of captioning
There are two types of captioning, automatic speech recognition (ASR) captioning and human-generated captioning.
- Automatic speech recognition (ASR) captions are machine-transcribed using ASR technology. They can be created relatively quickly, typically taking just 15 minutes to generate captions for an hour-long video. ASR captions are - at best - 70% accurate. They should be considered a starting point from which 100% accurate captions can be created - with some editing.
- Human generated captions take longer to produce but are at least 99% accurate – taking into consideration any typing errors and audio quality. The turnaround for most caption transcription services is usually 24 hours for a one hour-long video. If you script a video prior to recording the script can also be used to create human generated captions.
Panopto supports both types of captioning.
Adding machine-generated (ASR) captions to a Panopto video
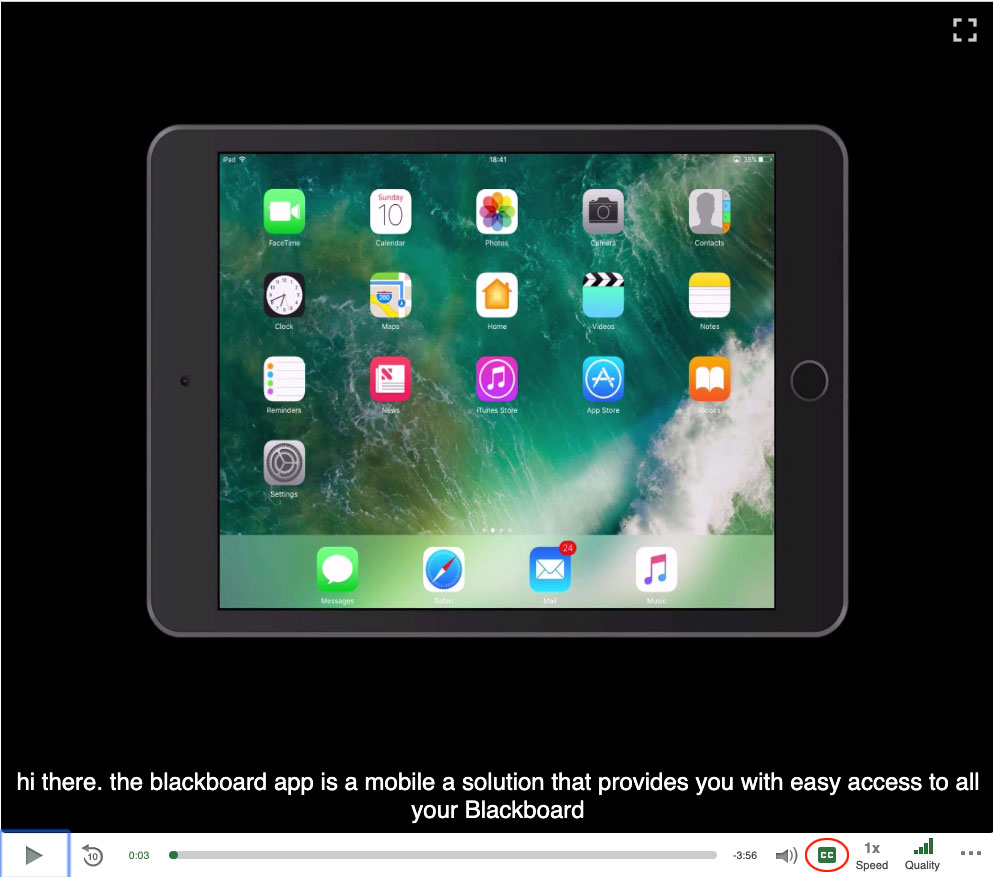
Machine-generated (ASR) captions are generated automatically for any uploaded video. When a video has been proccessed by Panopto and published, it will begin to embed the automatic captions e.g.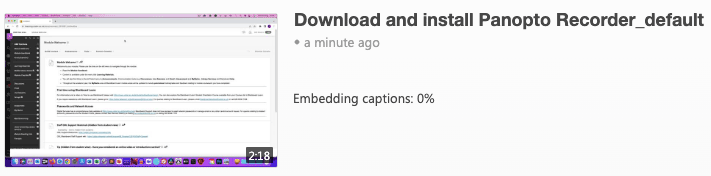
Audio quality, the speaker's accent and cadence, can affect the accuracy of the Automatic speech recognition (ASR) captions. If you need to edit the captions:
- Login to Blackboard Learn.
- Go to the module area containing the video.
- Select the Panopto Course Tool Application link you added when provisioning your module with Panopto. Typically, this the link in the module menu called Panopto. You will be taken to the module’s Panopto folder.
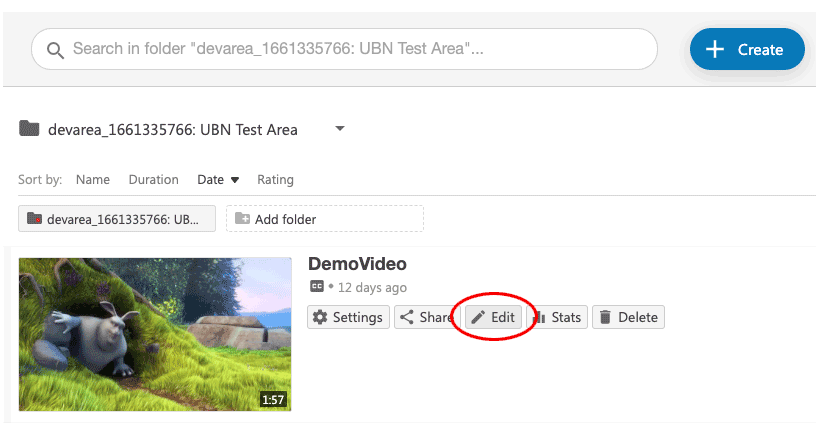
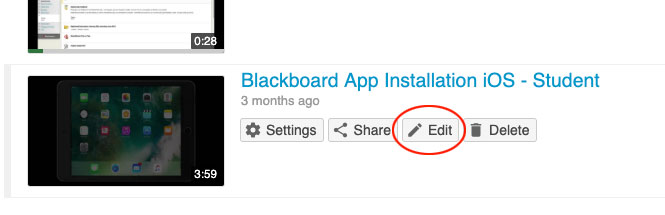
- Roll your mouse over the video you want to add captions to and select the Edit button (highlighted in red in the image below):
- The Panopto Online Video editor will open.
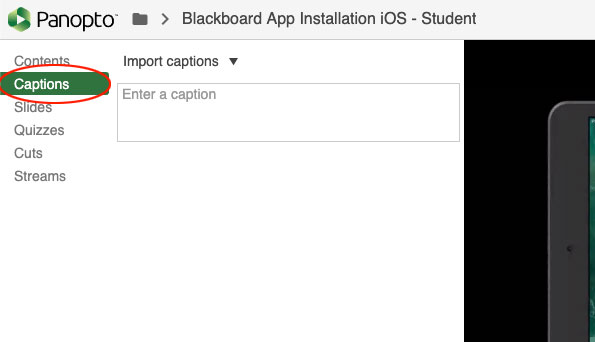
- On the Video Editor screen select the Captions tab.
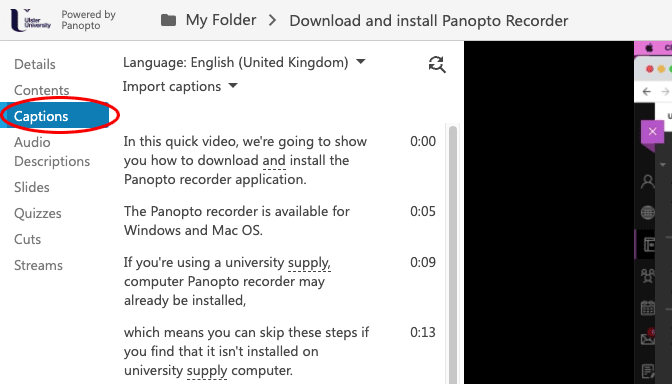
- To edit the captions, select them with your mouse and edit the text.
- When you are happy with the captions, select the Apply button at the top of the editor window.
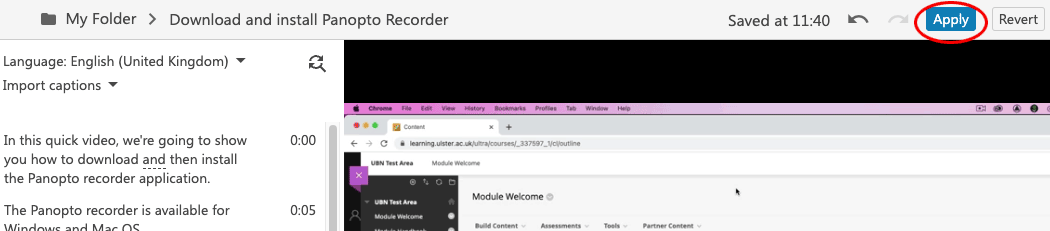
- After selecting the Apply button, it will take a few minutes for Panopto to republish the video with the embedded captions.
- A Closed Caption button will then be visible underneath the video in the video player. Selecting this will display the captions.
Adding Human generated captions to a Panopto video
Panopto allows the import of several types of caption file, for example. *.srt, *.ashx, *.vtt, and *.dxfp. Typically, these files consist of a text/xml file containing timestamps and text like this:
1
00:00:00,000 --> 00:00:00,833
Hi there

2
00:00:00,833 --> 00:00:03,166
This video will be a little longer than usual.
Caption files can be created using a simple text editor – following the format above – or using a dedicated captioning application.
Examples of dedicated captioning applications include SRT Edit Pro, a paid-for application for Mac/OSX and Subtitle Edit Pro which is a free subtitle/captioning application for Windows. Both applications are capable of creating .SRT caption files that can be imported into Panopto.
Please Note: Instructions on how to use each of these tools are beyond the scope of this support page, but the basic operation is the same. The user imports a video into the application, then starts and stops the video while manually entering the caption text. The application handles the process of adding the timestamps and combines these with the captions into a single file that can then be imported into Panopto.
Importing a caption file into Panopto
Human generated captions are added via the online video editor. Having created a caption file:
- Login to Blackboard Learn.
- Go to the module area containing the video.
- Select the Panopto Course Tool Application link you added when provisioning your module with Panopto. You will be taken to the module’s Panopto folder.
- Roll your mouse over the video you want to add captions to and select the Edit button (highlighted in the image below). The Panopto Online Video editor will open.
- On the Video Editor screen select the Captions tab.
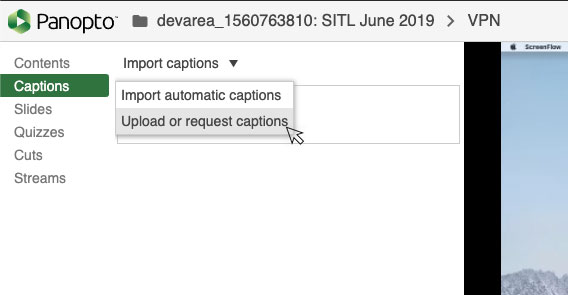
- From the Import captions drop-down select the Upload or request captions option.
- On the caption pop-up window that appears select the Choose file button under Upload Captions. In the file browser window that opens, find and select your caption file and choose the Open button.
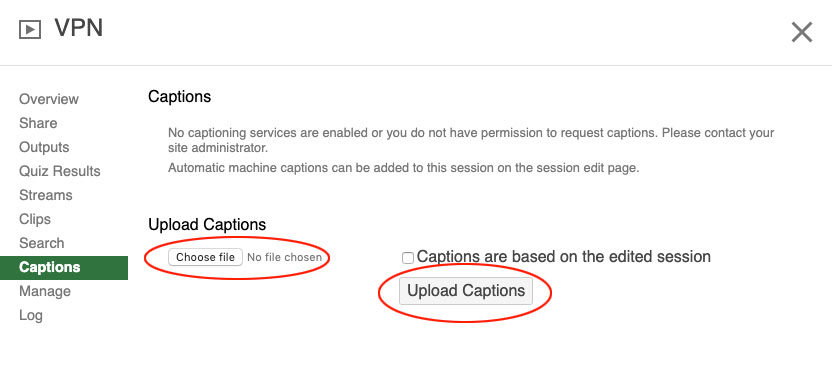
Select the Upload Captions button to add the captions to your video.
Please Note: If the captions are based on an edited session, select the Captions are based on the entire edited session checkbox
- Close the caption window using the X button at the top right of the pop-up window.
- It will take a few minutes for Panopto to republish the video with the embedded captions.
- A Closed Caption button will then be visible underneath the video in the video player. Selecting this will display the captions.
Alternative Caption Methods
An alternative method of adding captions to your videos is to use the real-time caption feature available in the latest version of PowerPoint for Windows and Mac.
The PowerPoint caption feature will display captions on-screen as you speak. Used in conjunction with the Panopto Recorder, you can capture both your presentation, your audio and the captions as they appear on screen.
Please Note: As the captions are being video captured - and not embedded into the video - they will not be indexed by Panopto and cannot be turned off by the viewer.
The process is the same for Windows and Mac users. To use PowerPoint captions:
- On the Slide Show ribbon tab, select Subtitle Settings.
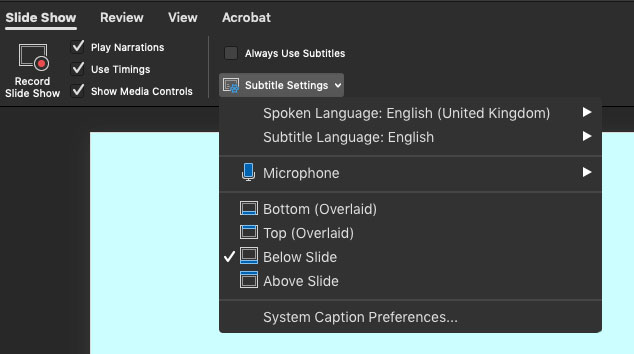
- Use Spoken Language to see the voice languages that PowerPoint can recognize and select the one you want. This is the language that you will be speaking while presenting. (By default, this will be set to the language corresponding to your Office language.)
- Use Subtitle Language to see which languages PowerPoint can display on-screen as captions or subtitles and select the one you want. This is the language of the text that will be shown to your audience.
- In the Subtitle Settings menu, set the desired position of the captions or subtitles. They can appear over the top or bottom margin of the slide (overlaid), or they can appear above the top or below the bottom of the slide (docked). The default setting is Below Slide.
- More appearance settings are available by selecting Subtitle Settings > System Caption Preferences.ee
- You can change the colour, size, transparency, and font style of the subtitles. You can change the background to improve contreast and make text easier to read.
- To begin, make sure your microphone is on, start your Panopto Recording then start your presentation slideshow.
- While presenting, select the Subtitle button to put PowerPoint into ‘listening’ mode

As you speak, PowerPoint will display your captions on-screen.
Please Note: Microsoft recommend the use of a headset microphone with the caption feature in PowerPoint. Additional instructions can be found here: https://support.office.com/en-us/article/present-with-real-time-automatic-captions-or-subtitles-in-powerpoint-68d20e49-aec3-456a-939d-34a79e8ddd5f