Submitting to a Panopto Student Video Assignment using the Panopto Application
- Gerard Ross
Introduction
In our support page, Submitting to a Panopto Student Video Assignment, we demonstrated the process of submitting a video to a Panopto Student Video assignment using your browser. Also briefly mentioned on that page is the My Folder personal folder that provides students with a private area for the upload and storage of videos.
Students can use the Panopto application to record their videos and upload them to their personal My Folder. The videos stored in a student’s My Folder can then submitted as part of a Panopto Student Video Assignment. This support page will demonstrate that process.
The workflow is:
- Download and install the Panopto Application
- Make a recording using the Panopto Application
- Upload the finished video to My Folder
- Submit a video from My Folder.
Table of contents
Download and install the Panopto Application
Please note:
To install the Panopto application you will need to have administrator access to the computer you are using. If you’re using your own computer, you will have the required access by default. If you are using a University computer, the Panopto recorder may already be installed. If it is not, you will need to contact Digital Services, or your Faculty Technician to have it installed. If you are using a computer supplied by your place of work, you may not have permission to install the Panopto Recorder application, in which case please contact your IT department.
To download the Panopto Application:
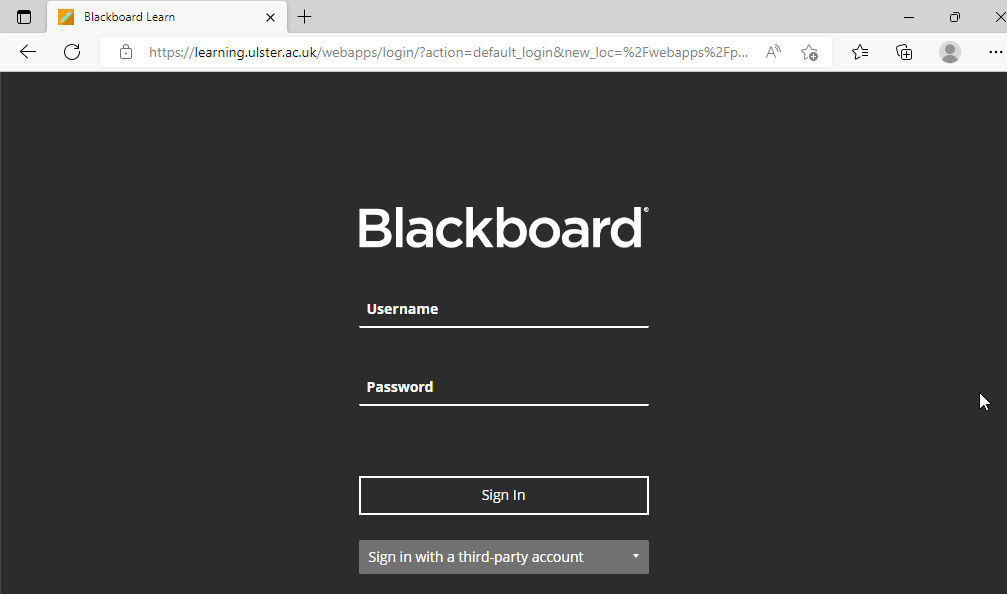
- Login to Blackboard Learn
- Go to a module area containing a Panopto Student Video Assignment
- In the instructions for the assignment, select the ‘click here’ link (highlighted in red below)
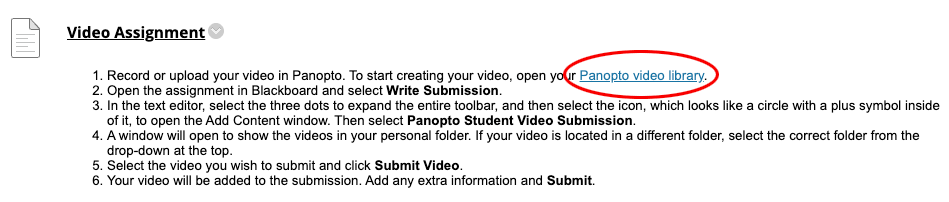
- Your Panopto personal folder (My Folder) will open.
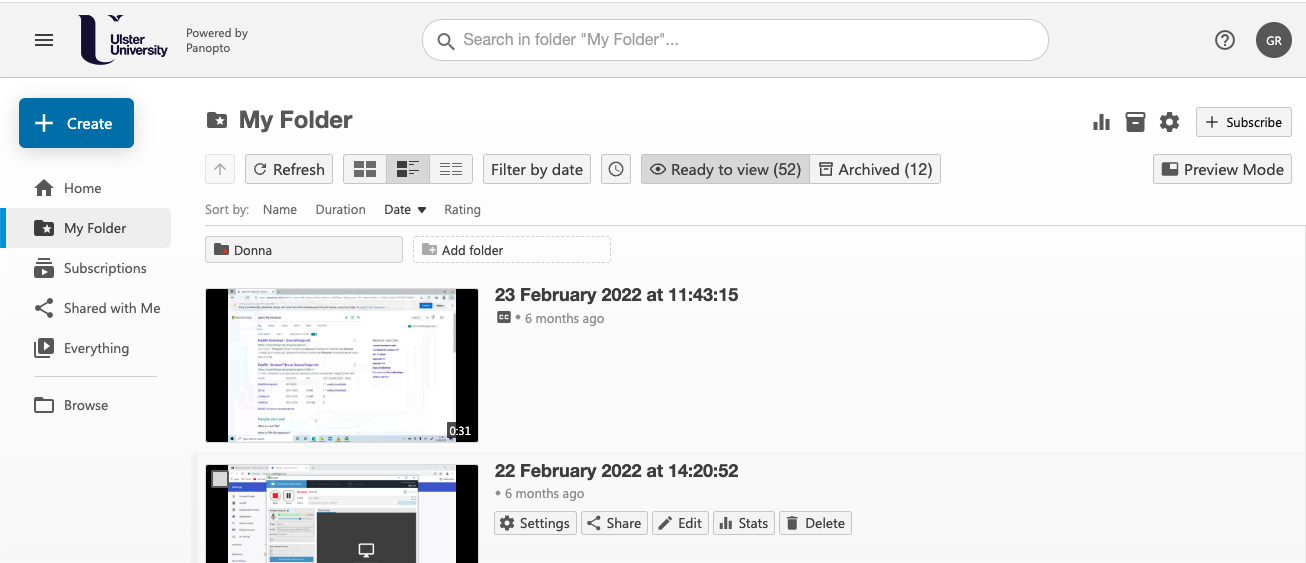
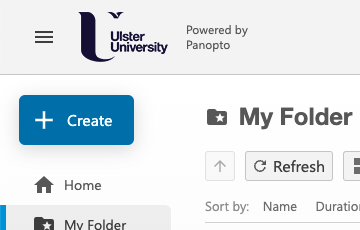
- Select the Create button:
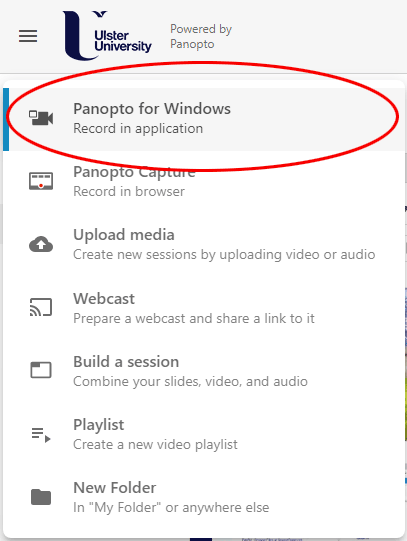
- Then choose Panopto for Mac, or Panopto for Windows (depending on what operating system you are using i.e. Windows, or OSX) from the drop-down menu that appears:
- On the Record a new session page window that opens, select the Download Panopto button:
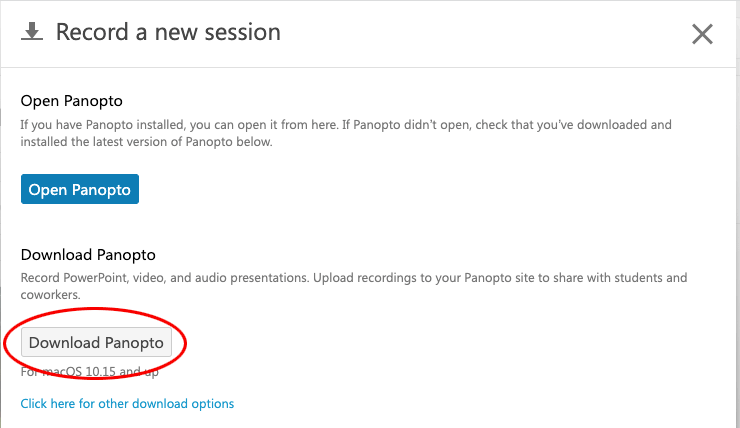
- The Panopto installer will begin to download.
- When it has finished downloading, double-click on the installer file to begin the installation process.
Go with the default options and select the next/continue buttons until the installation completes.
Please note:
Windows users may need to download and install additional supporting files. The Panopto installer will prompt you for permission to install these files. These files may take some time to download and install.
- When the installation has completed, restart your computer.
Make a recording using the Panopto Application
To make a recording, you will need the Panopto application, a microphone and - optionally - a webcam:
- When you first run Panopto, the server field should already be populated. However, check that it is pointing to the correct server i.e. https://ulster.cloud.panopto.eu
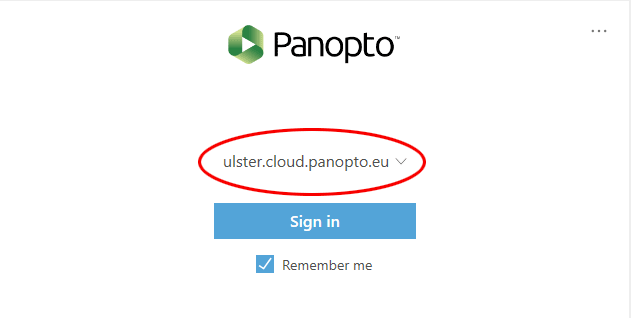
- Sign in by selecting the Sign in button:
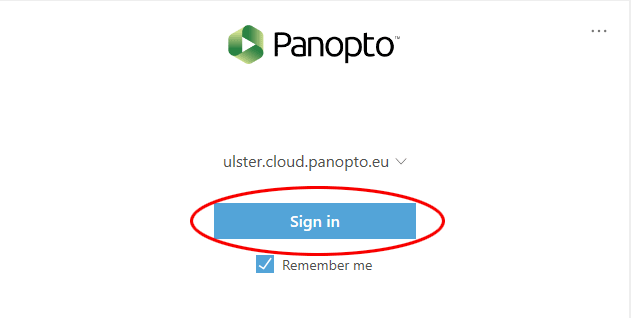
When you have done this, a login screen will appear. If Ulster Blackboard is not already selected as the login method, change it by selecting the dropdown menu on the page:
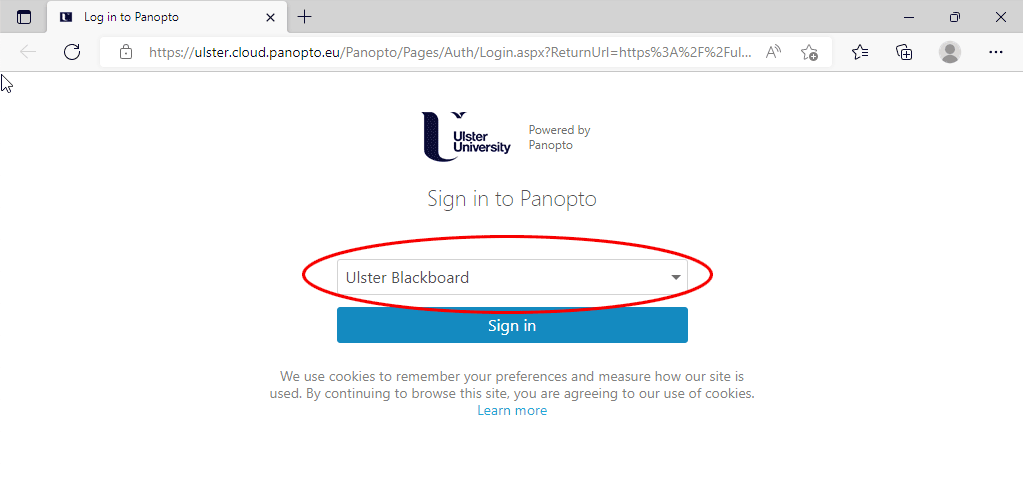
- Select the Sign In button and you will be redirected to the Blackboard Learn login screen:
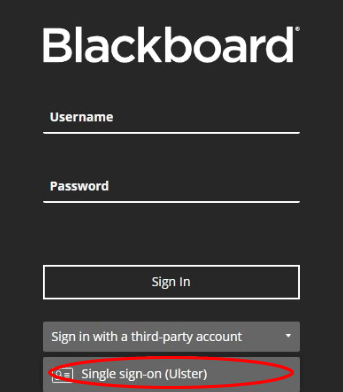
- Select the Sign in with a third-party account dropdown and change it to Single sign-on (Ulster) (highlighted in red in the image below):
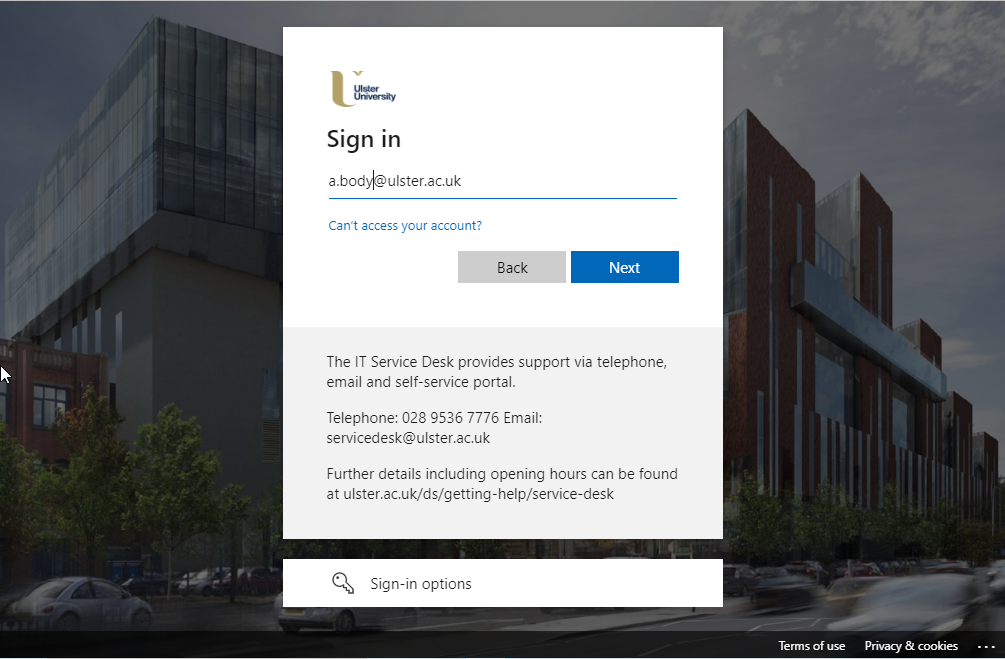
- After a few seconds you will be redirected to the University's login screen. Enter your Ulster University login credentials and approve the sign-in via the Authenticator app:
- A pop-up message will appear saying "This site is trying to open Panopto Recorder", select the Open button to allow the browser to authenticate and redirect you into the Panopto recorder app":

- The Panopto Recorder app will open:

- Enter a title for your video in Name. If left unchanged, the default title will be the date and time of the recording.

- Now you’ll need to decide what content you want to capture. This is done via the Primary Sources and Secondary Sources options.
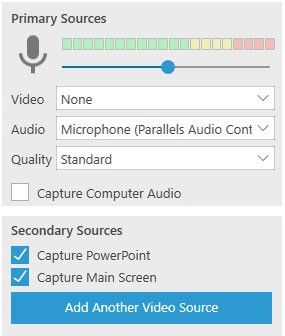
- If you want to be in the video, or to capture video of a guest lecturer, choose a webcam or video camera from the Video drop-down under Primary Sources.
Select your preferred audio input device via the Audio drop-down menu.
If the only option you see in this drop-down menu is None, or this option is greyed out, double check that your microphone is connected.Please note:
Test your audio volume by talking in a normal voice. You should see a few green bars appear as you talk. If you don't see any, or see the red and yellow bars highlighted, adjust the microphone’s volume up and down.
- Leave the Quality set to Standard.
If you want to capture audio coming from the computer, check the Capture Computer Audio box.
Please note:
This option can affect the quality of audio being recorded by the microphone. Only enable this option when absolutely necessary.
- If you want to record your screen or PowerPoint slides, check the options under Secondary Sources.
You can adjust the FPS setting - FPS means Frames Per Second - at the bottom of each of screen. This option maxes out at 15 frames per second. Increasing the FPS will increase the file size of your recording. As such, it’s probably best to leave this setting as is.
- When capturing the screen, select the Main Screen tab and tick Enable the screen capture preview to see a preview of the recording.
- When the Capture PowerPoint option is enabled, Panopto will capture the PowerPoint presentation and use the slide titles and thumbnails to generate video bookmarks which allow viewers to skip back and forth between sections of the published video.
- If you have chosen to capture a PowerPoint presentation, select the PowerPoint tab and choose the Open a presentation button to open the presentation you want to record.
If a PowerPoint presentation is running in the background when you launch Panopto, the Panopto application should automatically recognise this and choose the running presentation as the one to capture. However, do check the PowerPoint tab by selecting it and make sure the ‘Start presenting when recording starts’ checkbox is ticked.
Upload the finished video to My Folder
- When you are ready, select the Record button.

- Panopto will start recording all your chosen sources. If you've chosen to record your screen, you can minimize Panopto and begin displaying the content you wish to present.
- When you are finished, maximize Panopto again and select the Stop button.

The recording complete window will open. Select the blue Uploadbutton and your video will be uploaded to My Folder.
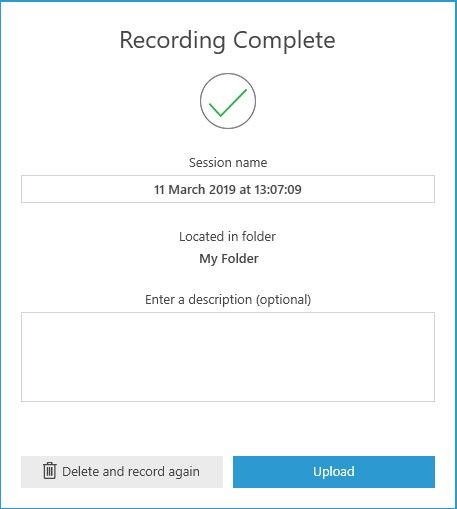
Please note:
The longer the presentation, the larger the video file will be. Allow time at the end of your recording session for the presentation to upload.
- The Status column will show the progress of the upload.
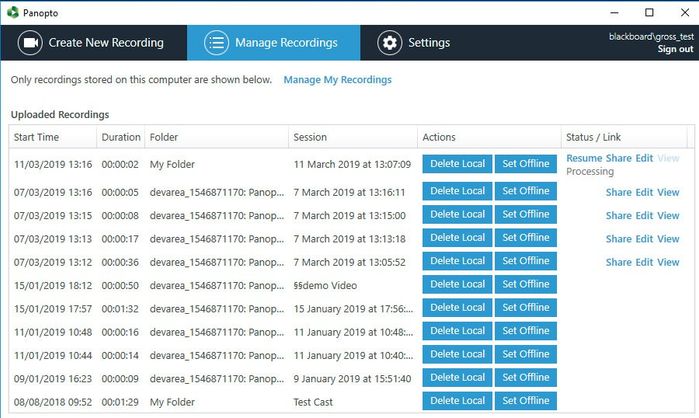
If you are making a recording with your personal computer, closing the Panopto application, or shutting down your computer will suspend the upload process. It should resume when you next open the Panopto application.
Once uploaded, Panopto will begin to transcode the video. Transcoding is the process of converting the video into different video formats.
Transcoding times depend on the quality of the video, the length of the video and the number of videos currently in the transcoding queue. When the video has finished transcoding it will be visible in your My Folder personal folder and can be submitted as part of a Panopto Student Video Assignment.Please note:
There is no need to leave your browser open after the recording has finished uploading and begun processing. You will receive an e-mail when your video has finished processing.
Submit a video from My Folder
To submit a video from My Folder to the Panopto Video Assignment:
- Log in to Blackboard Learn.
- Go to the module containing the Panopto Student Video Assignment.
- Locate the Panopto Student Video Assignment link and select the assignment title (highlighted in red in the image below):
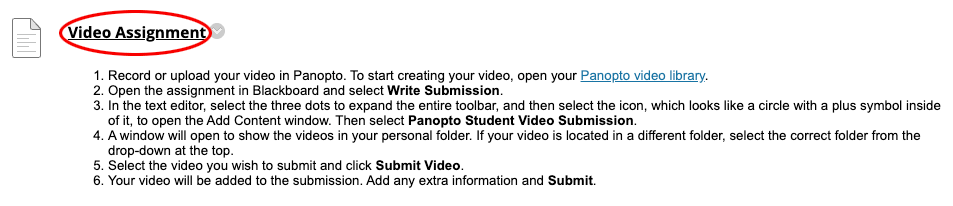
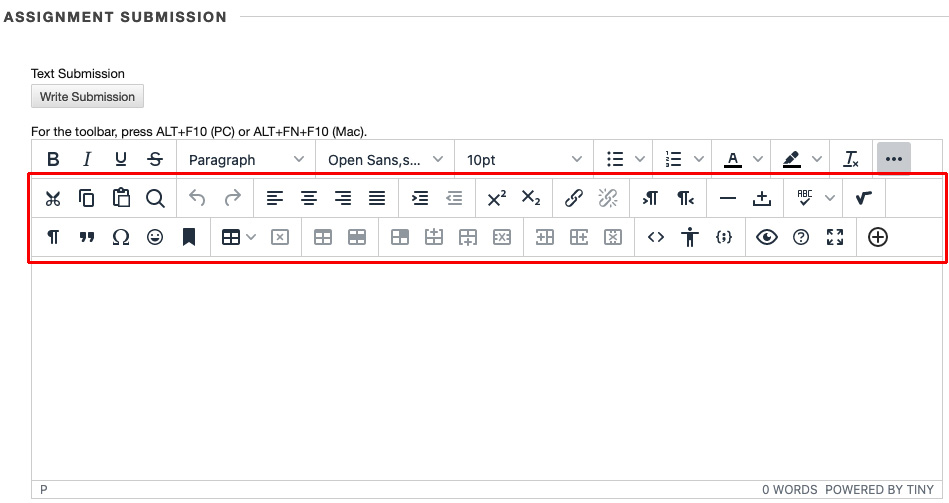
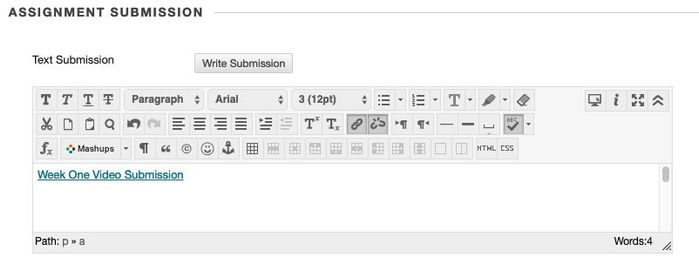
- The Upload Assignment page will open. In the Assignment Submission section, select the Write Submission button.

The content editor will open. By default, Blackboard shows the simple editor. To see the Advanced Editor, select the More... button (highlighted in red in the image below):
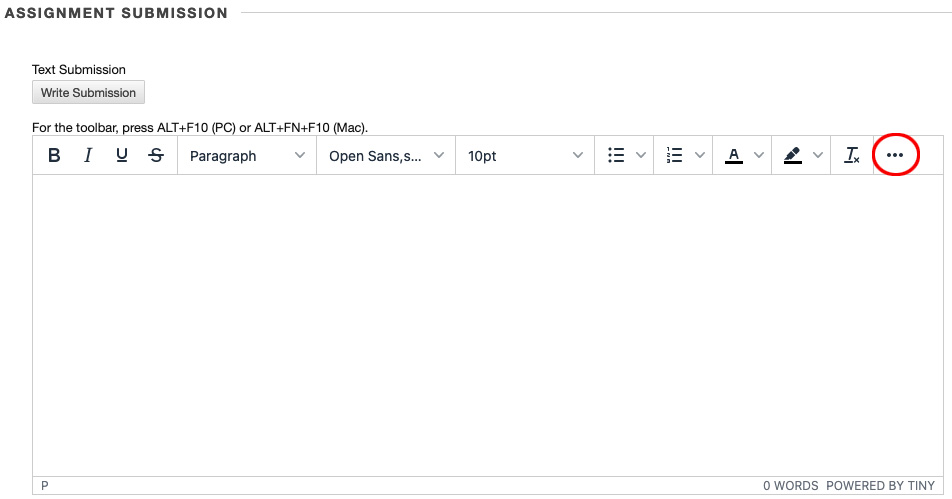
- Doing this will reveal the advanced editor tools:
Select the Add Content button
 and from the pop-up window that appears, select Panopto Student Video Submission under Additional Tools (highlighted in red in the image below):
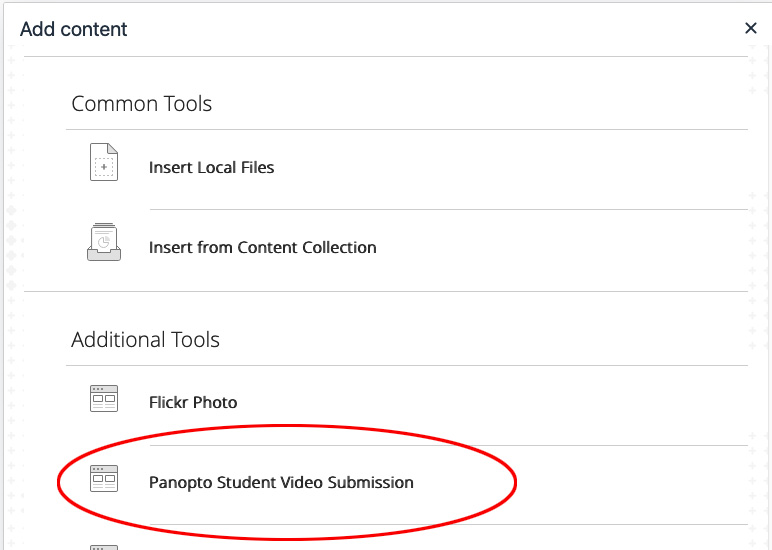
Note: There is also a Panopto Video option listed in the Additional Tools menu. DO NOT select this option.
- The Select Panopto Videos window will pop-up:
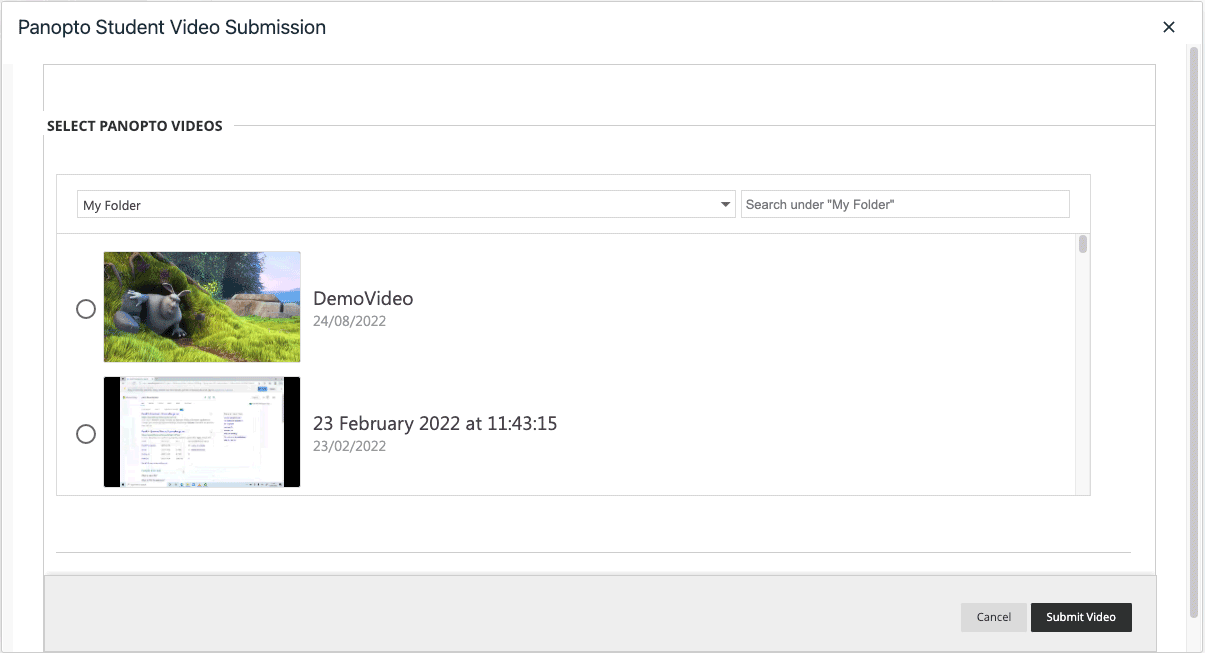
- If the drop-down menu at the top of this window shows anything other than My Folder, click on it and choose My Folder from the drop-down menu options:

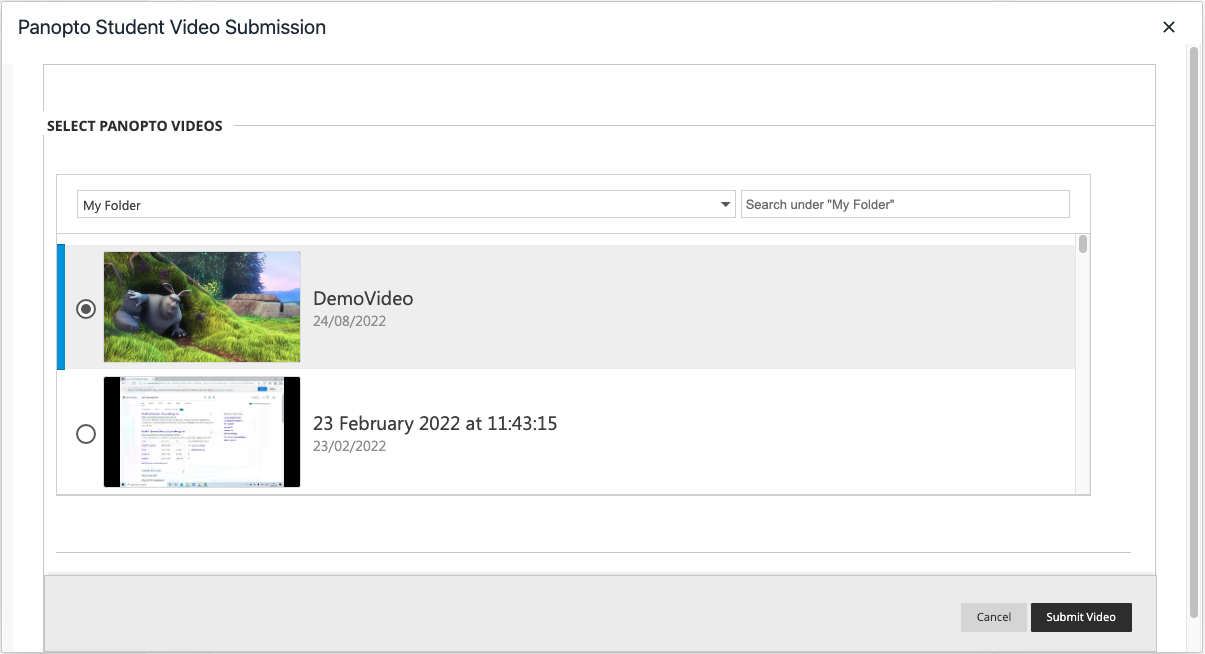
- The videos you have uploaded to your My Folder - and have finished processing - should be visible as thumbnails. Select the radio button next to the video you want to use and then select the Submit Video button.
- A link to your video will be embedded in the content editor. Please do not edit this link in any way, as it is possible to inadvertently break the link to the video.
- Use the Attach Files feature to add any additional text or attachments - as detailed in the assignment description.

- Finally, Submit your assignment