Chat Tool
- Gerard Ross
Introduction
The Chat panel enables the moderator to exchange text messages and emoticons with other participants in the session.

Table of contents
Opening the Chat Tool
To open the chat tool:
- Select the Collaborate Panel button.
- Select the Chat (speech bubble) icon located in the Collaborate Panel.

- If the Collaborate Panel has been collapsed and a chat message has been posted, the Chat icon will display the number of new chat messages since you last viewed the pane and will dynamically adjust as attendees enter additional messages.

Chat Permissions
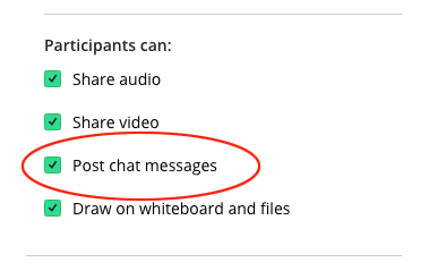
By default, Participants have permission to use the chat tool, however, Moderators have the ability to disable this permission for all participants. If the permission is disabled, attendees will continue to see messages posted prior to the setting change, but the text area in the Chat panel is replaced with a notification that the chat feature has been turned off.
To enable/disable chat permissions:
- Select the Collaborate Panel button.
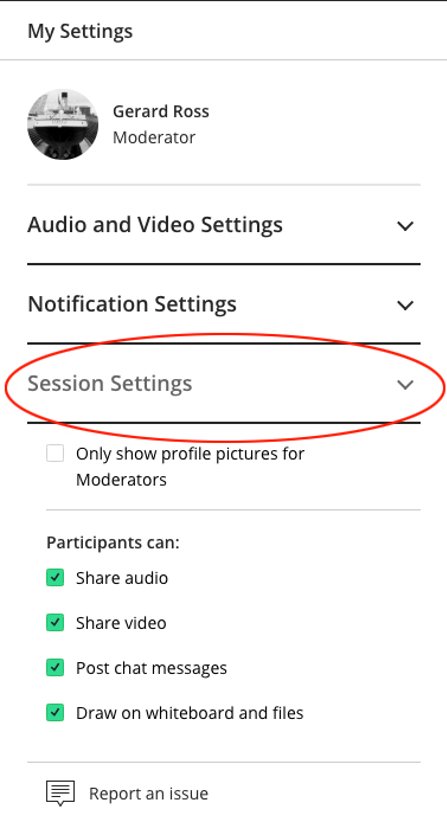
- Select the My Settings pane (cog icon highlighted in red below)

- On the My Settings pane that opens select the Session Settings link to reveal the current session settings.
- Check/Uncheck the Post chat messages permission to disable the chat tool in the current session.
Chat Channels
Different conversations within the Chat panel take place in separate thread areas called channels. The Chat panel then separates these channels into several areas depending on the type of chat.
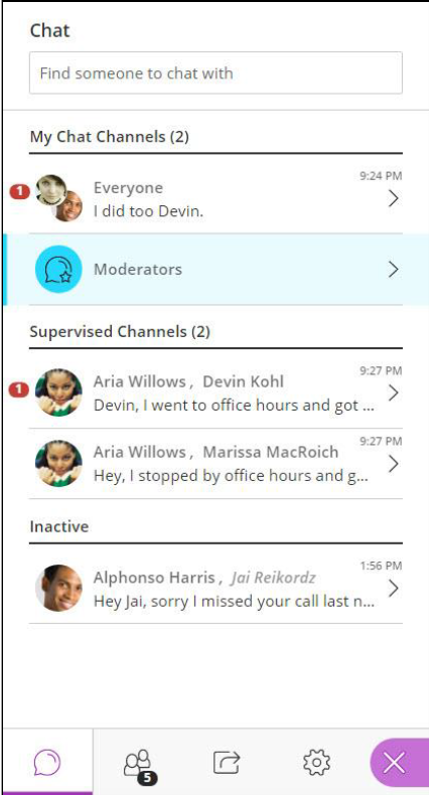
The My Chat Channels area houses channels in which the user is directly involved. This includes the Everyone channel and for Moderators, the Moderator channel.
Everyone Channel
The Everyone channel is the main chat area, and all participants can view messages posted to this chat area.
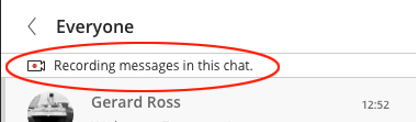
Note: The Everyone channel is the only channel currently included in recordings.
Moderator Channel
The Moderator channel allows all session Moderators to chat, as a group, outside of the main room channel.
Supervised Channels
Supervised Channels are private chat areas that can be enabled by the Moderator, allowing a participant to chat with another participant in the session. These private chats create separate channels that are only visible to those involved and moderators. These supervised chats populate a separate area of the Chat panel labelled Supervised Chats. When a member of a supervised chat leaves the session, the channel is moved to a new area of the panel called Inactive chats and the participant that left the session becomes italicized.
From this view, users can see which chats have unread messages, and how many messages each contains, by noting the number icon next to the specific chats.
How to Post a Chat Message
To post a chat message:
- Select the Collaborate Panel button.
- Select the Chat (speech bubble) icon located in the Collaborate Panel.
- Select the text area in the Chat panel and type the message you wish to send.
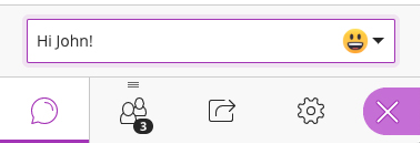
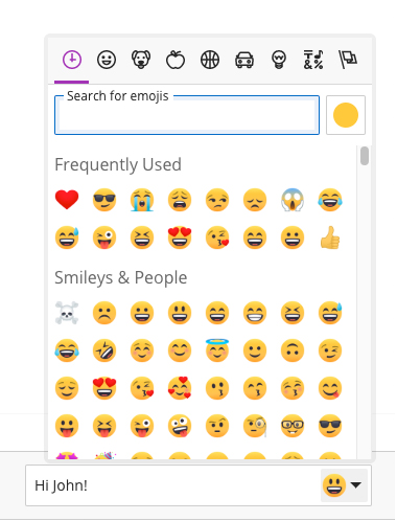
- Optionally, select the down arrow next to the smiley face to add one of the available emojis to the message.
- Press Enter or Return on your keyboard to post your message.
New Chat messages appear at the bottom of the Chat panel. You can scroll up and down this panel to read messages.
Note: When joining an ongoing session, chat messages posted prior to when you joined the session are not visible to you.
Tip: If the session is being recorded a notification displays at the top of this channel window, letting participants know that their chat messages will be captured as part of the recording.
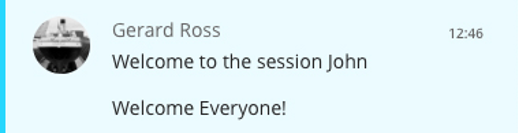
Messages entered by a Moderator display within a blue box:
While participant messages appear in a grey box. This distinction allows users to quickly scan the chat.

You can switch between chat channels using Previous Panel arrow located at the top of the panel.

When new messages appear in a channel other than the one currently being viewed, a notification icon displays next to the arrow.
Each message contains a timestamp for the post, along with each participant's name and profile picture (if one has been created). Links can be entered into Chat by using the keyboard shortcuts to copy a web address out of the browser and paste it into the text area. i.e. CTRL + C and CTRL + V (Windows) and CMD + C and CMD + V (macOS).
The Chat feature also allows participants to incorporate emojis into their messages, providing visual indicators of tone to both moderators and other participants.
Supervised Private Chat
Participants can begin a private chat with other participants in one of two ways.
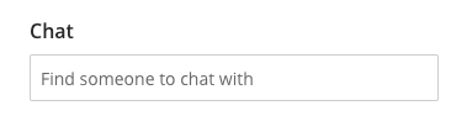
Via the Find someone to chat with box
- To begin a private chat from the chat panel, return to the main Chat panel to display all open chat channels.
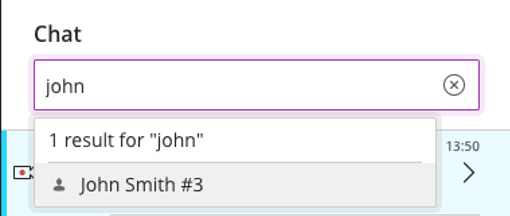
- Use the Find someone to chat with text box and type in a participant’s name.
- Select the participant from the names that display and begin chatting.
Via the Attendee Controls ellipsis
Participants can also start a private chat with another participant using the Attendee Controls ellipsis next to the user’s name on the Attendees Panel.
- Select the Attendee Controls ellipsis next to the user’s name in the Attendees Panel.
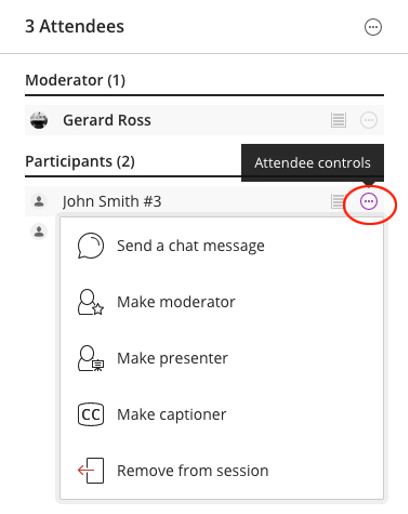
- Choose the Send a chat message option from the drop-down menu that appears.