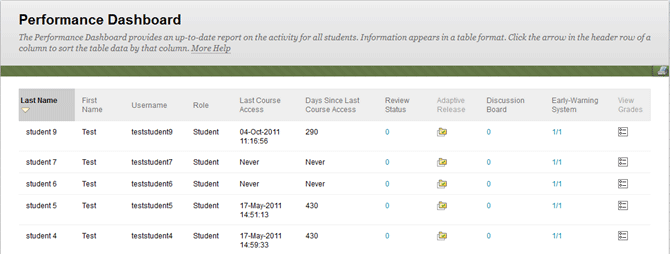
Performance Dashboard
Introduction
The Performance Dashboard tool provides a window into all types of user activity in a course or organization. All users enrolled in the course are listed, with pertinent information about that user’s progress and activity in the course.
Table of contents
Overview
The Performance Dashboard provides an up-to-date report on the activity for all students. Information appears in a table format. Click the arrow in the header row of a column to sort the table data by that column.
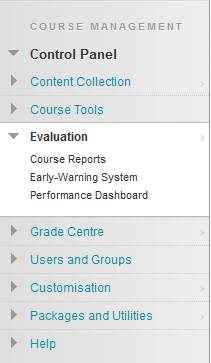
- Select Performance Dashboard under Evaluation in the Control Panel.
- The Performance Dashboard window will open. An up-to-date report on the activity for all students will be shown.
Tip
If you are concerned about the progress of a particular student, click the Adaptive Release icon to verify the visibility of content for the student or click the View Grades icon to see recorded grades.
Overall Summary of User Activity Reports
The Overall Summary of User Activity report displays user activity for all areas of the course, as well as activity dates, times and days of the week.
- Select Course Reports under Evaluation in the Control Panel.
- Select the contextual menu beside Overall Summary of User Activity and from the drop-down menu choose Run.
- In the Report Specifications section choose the format of your report from the Select Format drop-down menu (PDF, HTML, Excel or Word) .
- Complete the Select a Start Date and Select an End Date fields. Note that these are required fields.
- Select individual Users (if required).
- Select Submit to run the report.
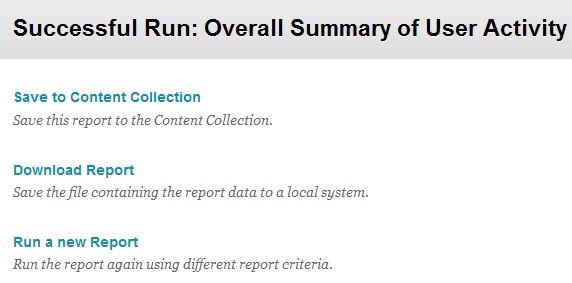
- Blackboard now confirms that the report has run and offers you a selection of actions:
- Save to Content Collection.
- Download Report.
- Run a new Report.
- Select Download Report to view student Blackboard access
Enabling Content Statistics Tracking
Statistics Tracking must be enabled in order to generate statistics for a content item. It can be enabled at any time and will begin to collecting date the moment it is enabled.
- Login to Blackboard.
- Turn Edit mode ON.
- Select the learning program you want to work with from the course list.
- Go to the learning program's content area - usually found in the course menu and simply called Content. The Content window will open.
- Select a content item's contextual menu.
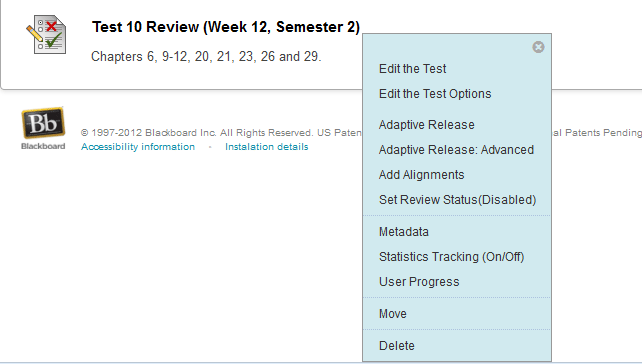
- Select Statistics Tracking (ON/OFF). The Statistics Tracking window will open.
- Statistics Tracking can be turned off and on. Select the On radio button.
- Select Submit to enable statistics tracking for the content item.
Tip:
Enabled Statistics Tracking will appear under a content item's title once the tool is enabled as shown in the example below.
![]()
*Important*
Make sure that your Blackboard Style is enabled to show Icon and Text. When Icon Only is enabled the Enabled: Statistics Tracking text is NOT visible to the Instructor.
- Select Customisation from Control Panel on the Course Management module.
- Select Style
- Scroll down to 5, Default Content View
- Select the radion button for Icon and Text
- Check the box for Apply this view to all existing content
- Select Submit

Running Content Usage Reports
With Statistics Tracking enabled, you can view statistics for a specific item. The report will give you the date, hour of the day and day of the week the item has been accessed.
- Select View Statistics Report from the contextual menu next to the content item.
- The Course Reports window will open.
- Select the Content Usage Statistics contextual menu and choose Run from the drop-down menu.
- In the Report Specifications section choose the format of your report from the Select Format drop-down menu (PDF, HTML, Excel or Word) .
- Complete the Select a Start Date and Select an End Date fields. Note that these are required fields.
- Select individual Users (if required).
- Select Submit to run the report.
- Blackboard now confirms that the report has run and offers you a selection of actions:
- Save to Content Collection.
- Download Report.
- Run a new Report.
Select Download Report.
Important
Students may assume they have entered a course, yet have only accessed the Announcement, Calendar, or Tasks areas. This does not show in Course Reports.