Blackboard Collaborate Classic
- Gerard Ross
Introduction
Collaborate Classic has now been replaced by the browser-based Blackboard Collaborate Ultra. For more information, please the following page: https://help.blackboard.com/Collaborate/Ultra, or, contact Blackboard Helpdesk on 028 903 68686 or blackboardhelpdesk@ulster.ac.uk. The Blackboard Colloborate Classic application has been removed from Student and Staff system images from academic year 2019/2020.
The Blackboard Collaborate Launcher provides a convenient and reliable way for you to launch your Blackboard Collaborate web conferencing sessions and recordings.
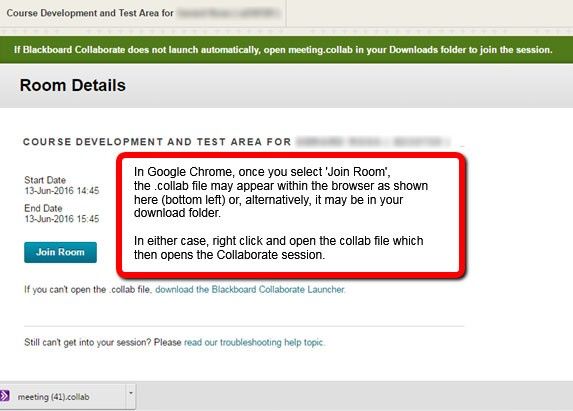
When you select Join Room on the Room Details page, or select a session link that has been sent to you in an e-mail, Blackboard checks to see if you have the Blackboard Collaborate Launcher installed. If it is not, you will be prompted to download and install the Blackboard Collaborate Launcher.
If the Blackboard Collaborate Launcher is installed, selecting a session or recording link triggers the download of a .collab file. This small .collabe file 'describes' the session and is unique to each user. Double clicking on the downloaded .collab file will start the Blackboard Collaborate Launcher.
Table of contents
Installing the Collaborate Launcher (Google Chrome Browser)
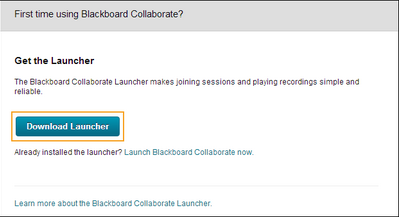
You only need to do this once. Thereafter, each time you joina Blackboard Collaborate Classic session, Blackboard will detect that you already have it installed and you will simply need to select the Launch Blackboard Collaborate now link.
If this is your first time, select Download Launcher.
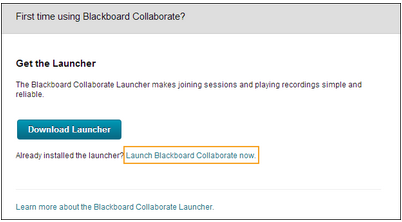
If you have already downloaded the Collaborate Launcher having joined a session earlier
Simply skip the Download Launcher step and select the Launch Blackboard Collaborate now. This will download the .collab file that you will use to join the session. Chrome will display the .collab file on the bottom of the browser, simply select the file name to open it and join the Collaborate session.
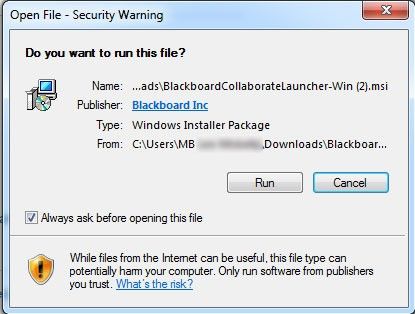
A pop up window appears while the launcher file is downloading on the bottom left of screen. It can take several minutes for the launcher to download (it’s approximately 43MB), wait until it has completed before selecting ‘OK’.
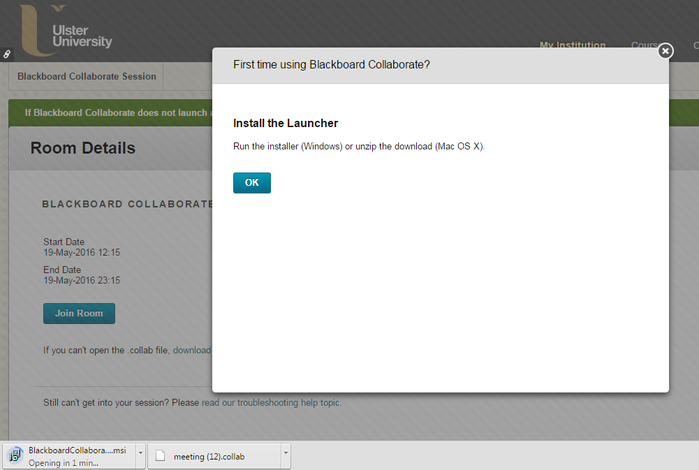
Once downloaded, double click on the BlackboardCollaborateLauncher file and select Run.
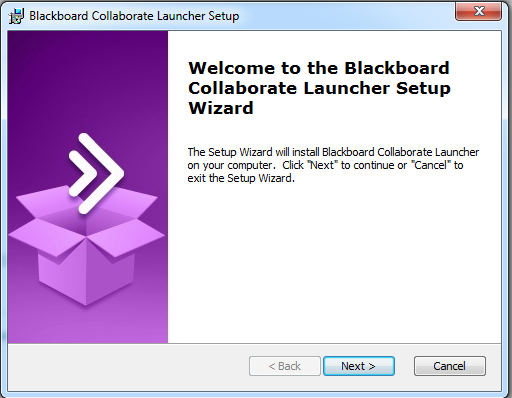
This will open the Blackboard Collaborate Launcher Setup Wizard, select Next and then select Run.
It may take a few moments to install the Launcher.
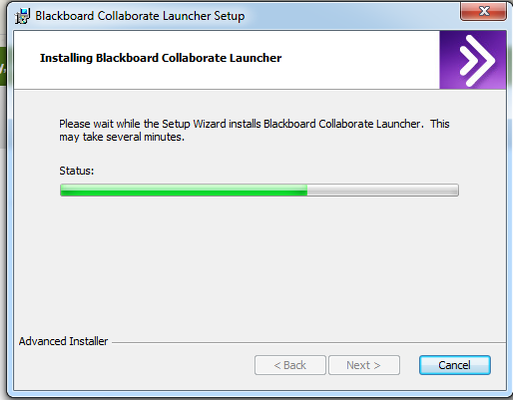
When coplete select Finish.
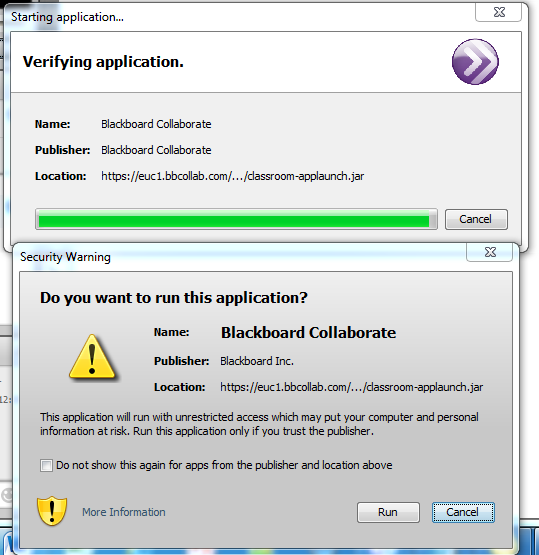
When the Collaborate Launcher is installed it will open a Verifying Application box with a security warning Do you want to run this application?, select Run.
Collaborate will open when all 5 grey progress circles turn amber (in the example below 2 circles are amber as the Launcher prepares to open)
When collaborate opens, you will then see, Audio/Video control panel, Participant and Permissions panel, Online Chat, and Whiteboard panels:

Check your Audio is working
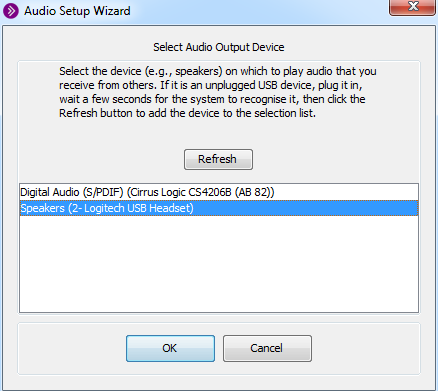
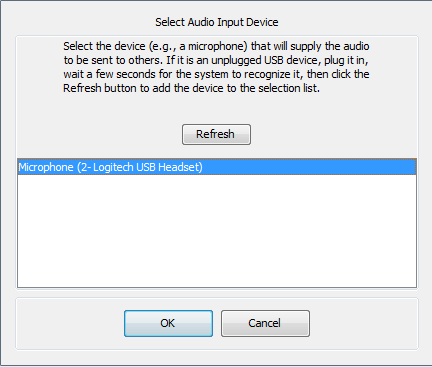
The audio wizard is situated at the top right hand of the ‘Audio & Video’ panel. Select the audio wizard to ensure your audio is working. This will allow you to select the audio output and input devices, eg.headphones and microphone.

If you have added a new or additional audio output device, select refresh and when it appears in the listing, select it and then select ok.
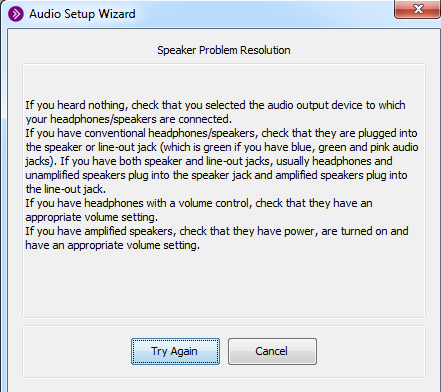
A new panel opens with the audio play back of a pre-recorded message to test the audio output, you can adjust the audio using the slider bar. Select play.
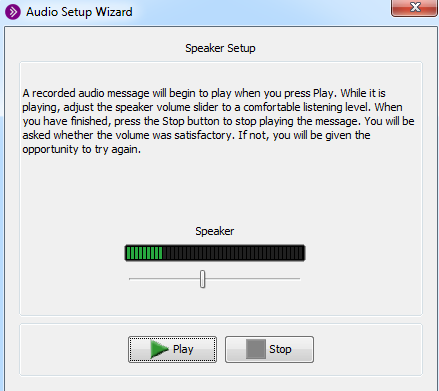
You can adjust the volume from the slidre bar in the centre of the panel. If you select stop or wait until the recorded message is finished, the wizard will prompt you to confirm your speaker volume is working or to repeat the test.
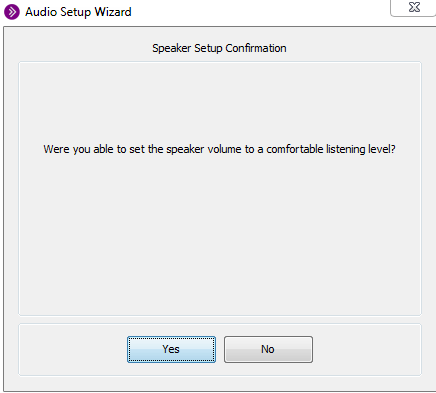
If you select Yes, you will be asked to confirm your audio device and the audio wizard will proceed to test your microphone set up.
If you select No, you will be prompted to take the audio test again.
If you selected Yes, you will proceed to the microphone setup, select record and input some test speech
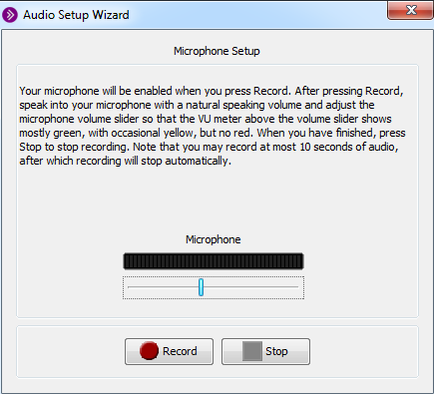
Like the audio test you can adjust the volume from the centre slider bar.
If you select stop or the test microphone record time runs out, it will replay your message to your headset or speakers.
Again, you will be prompted to confirm your microphone levels (Yes) or repeat the test again (No).
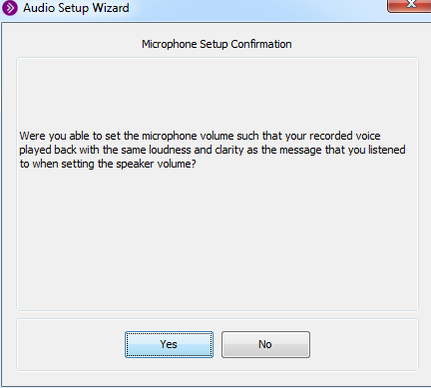
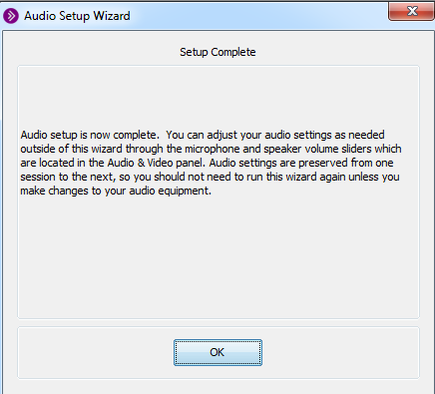
If you select Yes, you are then prompted to complete the audio wizard setup.
Switching your Audio and Video On and Off
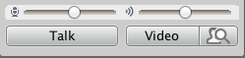
To turn your Audio and Video on (to test they are working but also to communicate with your room participants), you will need to select the Audio and Video buttons. When the Audio and Video are switched off, the buttons will look like this:
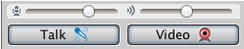
To switch your Audio and/or Video on, simply select the button(s) shown above. Once the Audio and/or Video are switched on, the buttons will now look like this:
Invitation to join a Collaborate session
Your instructor will either add a link within your module or possibly email you a link.
This is an example of a Collaborate link within module content

This is an example of a session link attached to an email.
By selecting either, you will be able to select Join Room