Introduction
The Collaborate Scheduler is used to create your Blackboard Collaborate sessions as well as view recordings. Use the Collaborate Scheduler to set the date for your session, the designated start and stop times and then tell your participants how to find it.
Table of contents
Collaborate Scheduler Overview
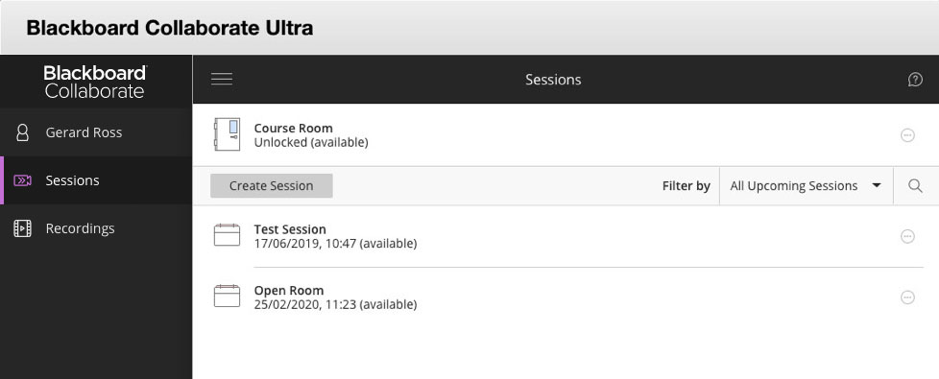
In the Scheduler, you'll find the following:
Course Room
At the top of the scheduler page is a link to the default Course Room. The course room is an open session dedicated to the module area.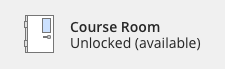
Note: The Course Room is only available when you access Blackboard Collaborate Ultra from inside a module area. By default, the Course Room session is permanently open and available for use.
Create Session
The Create Session button is used to create new sessions.
![]()
All Upcoming Sessions will be listed after the Create Session button. If you don't see or can't open the Course Room, your administrator has turned it off, or the module co-ordinator has ‘locked’ the Course Room.
Session Options
Open the Session options menu to join, edit or delete the session. You can also copy a guest link and view reports for the session.
![]()
The sessions option button is represented by an ellipsis icon (three dots ... ).
Menu
Select the menu button to open the Menu to switch between a list of sessions and a list of session recordings. The Menu is hidden by default.
![]()
To show/hide the menu select the Menu ‘hamburger’ icon.
Collaborate Scheduler Details
The Course Room
The Course Room is an open session dedicated to your course. It provides you and your participants with a ‘launch point’ for classes or impromptu meetings.
The default course room is available to anyone and participants can join this session at any time by selecting the link. Instructors don't have to be present for participants to join the Course room session. For this reason, it is recommended that you create a new, separate, supervised session for each event you’ll be hosting.
Note: If you don't see or can't open the Course Room, your administrator has turned it off, or the module co-ordinator has ‘locked’ the Course Room.
To join the Course Room session:
- Login to Blackboard Learn at https://learning.ulster.ac.uk
- Go to the module area you’ll be hosting the session from.
- Select the Collaborate Ultra link you added to the module menu, or, under Course Tools (module instructor only), select the Blackboard Collaborate Ultra tool link.
- On the Collaborate Scheduler page that opens, select the Course Room name (highlighted in red below)

- Or select the Session Option button to the right of the session name (the ellipsis icon … ) and choose Join Course Room from the drop-down menu that appears.

Create Session
To create a new Blackboard Collaborate Ultra session:
- Login to Blackboard Learn at https://learning.ulster.ac.uk
- Go to the module area you’ll be hosting the session from.
- Select the Collaborate Ultra link you added to the module menu, or, under Course Tools (module instructor only), select the Blackboard Collaborate Ultra tool link.
- On the Collaborate Scheduler page that opens, select the Create Session button. A new session dialogue box will open.

- Give the session a meaningful name e.g. ‘Online Seminar (02 November) 9am - 12 am’. This helps students find the correct session.

- The event needs a start and end date and time. This is done in the Event Details section:

- You can choose to keep a session permanently open by selecting the No end (open session) checkbox. Doing so will disable the End date options.

Selecting the Repeat Session option reveals the menu below:

There are options to repeat sessions on a Daily, Weekly or Monthly basis.Note: Take care using the Repeat Session option so as to not end up with scheduled sessions that you do not need, as this can be confusing for participants.
The Early Entry option allows you to choose when participants can enter the session - prior to the start time.

Early Entry for participants can be set up to 60 minutes before the session begins, or to prevent participants from joining the session before the official start time.Tip: Consider enabling Early Entry to allow participants time to run their audio and video tests before a session begins and contact the Blackboard Helpdesk if required.
- Select the Provide a description link (highlighted in red below) to open the Description box. Use the description box to give participants some information about the session and provide any session specific instructions.

- At the bottom of the Create Session dialogue window are the Session Settings (shown below). Use these settings to decide the default role for all participants and who can do what in your sessions.

By default, any attendee - who has not been assigned a Moderator role - will join a Blackboard Collaborate Ultra session as Participant. The default Participant role can be changed via the Default Attendee Role drop-down menu. All Participants can instead be given the role of Presenter or Moderator.

Note: Care must be taken when changing default attendee role. If participants are given Presenter or Moderator access to the session, they will have the ability to share documents, end recordings and stop a session. For this reason, we advise against changing this option and recommend that moderators use their ability to promote participants during the session.
- In the Recording section there are options to enable the download of session recordings and anonymise chat messages.

For accessibility reasons, we recommend enabling the Allow recording download option. This feature allows participants to download a video copy of the session for later playback on their own devices. We also recommend that this option is enabled when setting up the session, rather than after the session has ended.
The Anonymise chat messages option should be enabled if you are sharing the session publicly. - Under Moderator permissions there is the option to Only show profile pictures for Moderators.

Enable this option for large sessions or if you have concerns about what profile pictures Participants might choose to share during the session. Under Participants can the options below are enabled by default:
- Share Audio
- Share Video
- Post chat messages
- Draw on whiteboard and files
Note: If you’re hosting a session with a lot of participants, you may want to disable the Share Audio and Share Video options to prevent audio interference during the session. You should let participants know prior to the start of the session that these options have been disabled.
- Enable session Telephony allows you to disable and enable telephone access to the session. You may want to disable telephone access to prevent participants incurring significant telephone charges.

- The final options under Private Chat are Participants can only chat privately with moderators and Moderators supervise all private chats.
We would recommend enabling the Moderators supervise all private chats option to prevent inappropriate use of the Private Chat feature. You should let participants know prior to the start of the session that this option has been enabled.
- The final step is to select the Save button to save your session and its settings.
