...
- Select Performance Dashboard under Evaluation in the Control Panel.

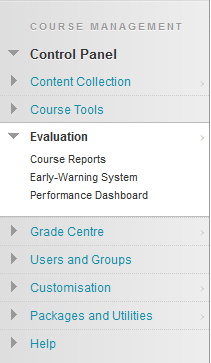
- The Performance Dashboard window will open. An up-to-date report on the activity for all students will be shown.


| Tip |
|---|
Tip |
...
- Select Course Reports under Evaluation in the Control Panel.
- Select the contextual menu beside Overall Summary of User Activity and from the drop-down menu choose Run.
- In the Report Specifications section choose the format of your report from the Select Format drop-down menu (PDF, HTML, Excel or Word) .
- Complete the Select a Start Date and Select an End Date fields. Note that these are required fields.
- Select individual Users (if required).
- Select Submit to run the report.
- Blackboard now confirms that the report has run and offers you a selection of actions:
- Save to Content Collection.
- Download Report.
- Run a new Report.

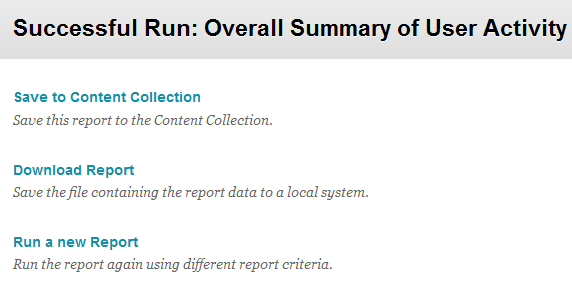
- Select Download Report to view student Blackboard access
...
- Login to Blackboard.
- Turn Edit mode ON.
- Select the learning program you want to work with from the course list.
- Go to the learning program's content area - usually found in the course menu and simply called Content. The Content window will open.
- Select a content item's contextual menu.

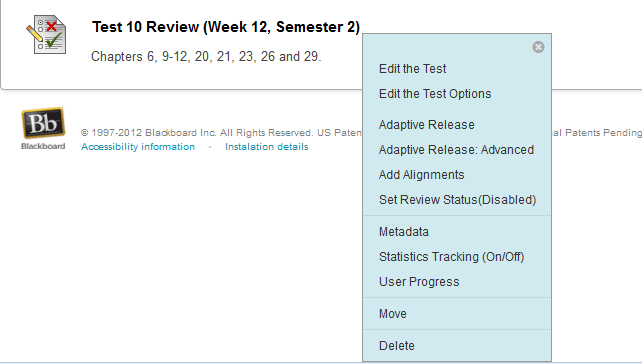
- Select Statistics Tracking (ON/OFF). The Statistics Tracking window will open.
- Statistics Tracking can be turned off and on. Select the On radio button.
- Select Submit to enable statistics tracking for the content item.
| Tip |
|---|
Tip: |
![]()
![]()
| Warning | ||
|---|---|---|
| ||
Make sure that your Blackboard Style is enabled to show Icon and Text. When Icon Only is enabled the Enabled: Statistics Tracking text is NOT visible to the Instructor.
|
Running Content Usage Reports
...
- Select View Statistics Report from the contextual menu next to the content item.
- The Course Reports window will open.
- Select the Content Usage Statistics contextual menu and choose Run from the drop-down menu.
- In the Report Specifications section choose the format of your report from the Select Format drop-down menu (PDF, HTML, Excel or Word) .
- Complete the Select a Start Date and Select an End Date fields. Note that these are required fields.
- Select individual Users (if required).
- Select Submit to run the report.
- Blackboard now confirms that the report has run and offers you a selection of actions:
- Save to Content Collection.
- Download Report.
- Run a new Report.
Select Download Report.
Warning title Important Students may assume they have entered a course, yet have only accessed the Announcement, Calendar, or Tasks areas. This does not show in Course Reports.
Other Tools to Monitor Student Progress
...