...
- Login to Blackboard Learn.
- Select the prograkmme you wish to work in from the Course List.
- From the Control Panel menu select the Content Collection link. The Content Collection menu will expand.
- Select the Content Page link. The Content Page link will always point to the current programme’s root content area. In the example below it is the highlighted link e230729_dev_course. The Course Content page will open.


From the Action Bar select the Set Up Web Folder button.


Tip Note:
Mac users will see a Set Up Shared Location button.- The Using Web Folders page will open. Highlight and Copy the contents of the Current Web Address field:


- On the Using Web Folders page Blackboard Learn will detect if you are using Windows 7, Windows Vista or Windows XP and provide OS specific instructions for setting up WebDAV folders. These are recreated below.
...
Full instructions are available below:
Windows XP Instructions
...
...
Windows
...
| Info |
|---|
You can now access this network place at any time from “My Network Places”. It will remain there until you delete the shortcut. Deleting the shortcut will not affect the module content. |
Windows Vista Instructions
Software Update Instructions
To update the Web Folders component in Microsoft Windows and provide the additional functionality needed to use WebDAV, Windows Vista users may have to download a software update from Microsoft.
- You will need the "Software Update for Windows (KB907306)" which is available here: http://www.microsoft.com/downloads/details.aspx?FamilyId=17C36612-632E-4C04-9382-987622ED1D64&displaylang=en
- Select the "Download" button and save the file named, "Webfldrs-KB907306-ENU.exe" to your computer.
- Double-click the file to install the update.
- When the update has installed, restart your computer.
| Info |
|---|
Note: You will need administrator access to your computer to install this update. Those without this access should contact their system administrators. |
Setting up WebDAV in Vista
...
7 Instructions
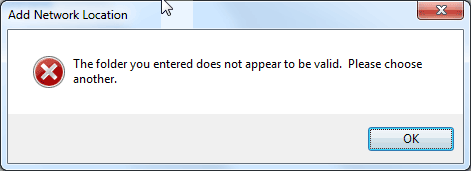
Windows 7 users should attempt to set-up WebDAV using the Windows Vista instructions detailed above. However, if you receive the following pop-up message, “The folder you entered does not appear to be valid. Please choose another” then it is likely that you are affected by a common issue with WebDAV authentication in Windows 7. This issue was resolved in a recent Windows Update, however, if you are using a PC that isn't up-to-date and have no way of updating it, it is recommended that you use a third party software solution to transfer files using WebDAV. We currently use AnyClient. 
Installing AnyClient
...
- After launching AnyClient, click Site Manager from the File menu.
- Click New and replace the text "NewSite" with the name of the WebCT Module and its CRN.
- Fill out the information under General:
- Enter or paste the unique WebDAV URL for your Module area in the Host box.
- Enter your Staff number and network password login information for Username and Password.
- Choose WebDAV as your Connection type from the drop down menu.


- Click Save.
- Click Connect.
- Select and Transfer files between your Local System and WebCT (Remote System) by selecting files or groups of files and folder and using the double arrows in the center of the window to transfer them to and from the WebCT module area.


Mac OSX Instructions
- Select Go from the top menu.
- Select Connect to Server... from the drop down menu.


- The Connect to Server window will open.
- Enter or paste the WebCT modules unique WebDAV url into the Server Address Box. See the bbldevmove:Obtaining WebDAV Info section above to find out how to retrieve the WebDAV url for your module.
- Select the Connect button.


- A NetAuthAgent pop-up will ask if you want to allow it to add information to your keychain. Select the Allow button.


- You will prompted for a name and password. Enter your staff number and network password.
- Select the Connect button.


- OSX will open the WebDAV folder.

